테스환경구축
- wsl(우분투) 환경 docker 설치 및 kind(k8s) 설치
- Jenkins 설치 및 셋팅
- Gogs 설치 및 셋팅
CI/CD 환경 구축
- ArgoCD (CD), Jenkins (CI), Gogs(git), 환경 kind(k8s)
윈도우 wsl 환경에 docker 설치, kind 및 관리 툴 설치 활용
구성도

kind 설치 : Windows (WSL2) 사용자
docker 설치
| # WSL2 에 Docker 설치 : 아래 스크립트 실행 후 20초 대기하면 스크립트 실행 됨 curl -fsSL https://get.docker.com -o get-docker.sh sudo sh ./get-docker.sh ... 약 5분정도. # 설치 확인 docker info 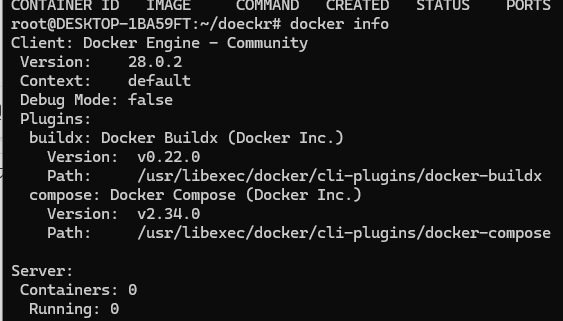 sudo dockerd & - 필요 docker ps cat /etc/group | grep docker |
kind 설치
| # 기본 사용자 디렉터리 이동 cd $PWD pwd -- wsl에서 systemctl 사용 시 추가 sudo nano /etc/wsl.conf [boot] systemd=true 추가 # sudo systemctl stop apparmor && sudo systemctl disable apparmor # sudo apt update && sudo apt-get install bridge-utils net-tools jq tree unzip kubectx kubecolor -y # Install Kind curl -Lo ./kind https://kind.sigs.k8s.io/dl/v0.27.0/kind-linux-amd64 chmod +x ./kind sudo mv ./kind /usr/local/bin/kind kind --version  # Install Kubeps & Setting PS1 git clone https://github.com/jonmosco/kube-ps1.git echo -e "source $PWD/kube-ps1/kube-ps1.sh" >> ~/.bashrc cat <<"EOT" >> ~/.bashrc KUBE_PS1_SYMBOL_ENABLE=true function get_cluster_short() { echo "$1" | cut -d . -f1 } KUBE_PS1_CLUSTER_FUNCTION=get_cluster_short KUBE_PS1_SUFFIX=') ' PS1='$(kube_ps1)'$PS1 EOT # .bashrc 적용을 위해서 logout 후 터미널 다시 접속 하자 exit |
kind 로 k8s 배포 : Windows (WSL2) 사용자
| # 클러스터 배포 전 확인 docker ps mkdir cicd-labs cd ~/cicd-labs # WSL2 Ubuntu eth0 IP를 지정 ifconfig eth0 MyIP=<각자 자신의 WSL2 Ubuntu eth0 IP> MyIP=172.21.19.102 # cicd-labs 디렉터리에서 아래 파일 작성 cat > kind-3node.yaml <<EOF kind: Cluster apiVersion: kind.x-k8s.io/v1alpha4 networking: apiServerAddress: "$MyIP" nodes: - role: control-plane extraPortMappings: - containerPort: 30000 hostPort: 30000 - containerPort: 30001 hostPort: 30001 - containerPort: 30002 hostPort: 30002 - containerPort: 30003 hostPort: 30003 - role: worker - role: worker EOF kind create cluster --config kind-3node.yaml --name myk8s --image kindest/node:v1.32.2 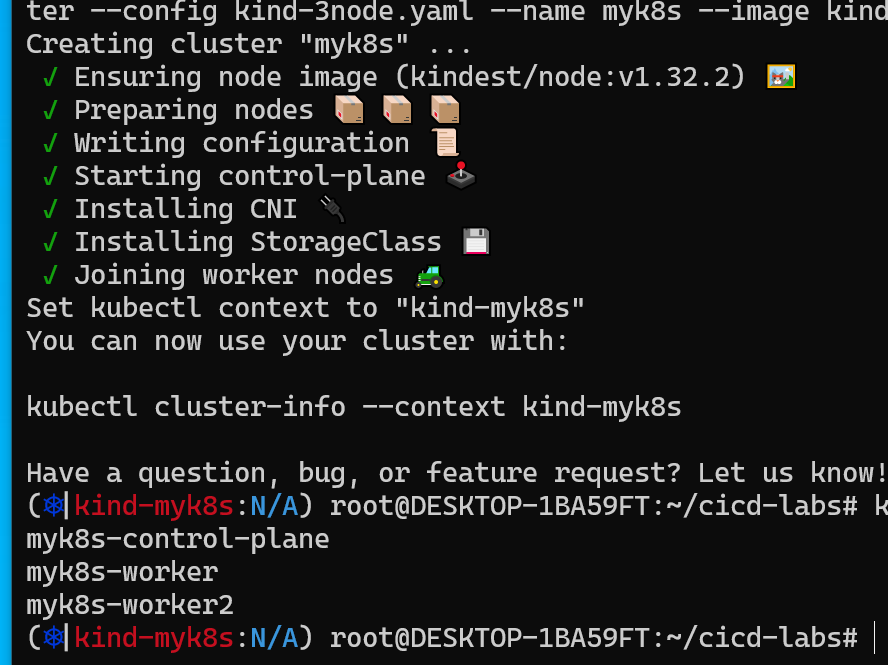 # 확인 kind get nodes --name myk8s kubens default # kind 는 별도 도커 네트워크 생성 후 사용 : 기본값 172.18.0.0/16 docker network ls docker inspect kind | jq # k8s api 주소 확인 : 어떻게 로컬에서 접속이 되는 걸까? kubectl cluster-info # 노드 정보 확인 : CRI 는 containerd 사용 kubectl get node -o wide # 파드 정보 확인 : CNI 는 kindnet 사용 kubectl get pod -A -o wide # 네임스페이스 확인 >> 도커 컨테이너에서 배운 네임스페이스와 다릅니다! kubectl get namespaces # 컨트롤플레인/워커 노드(컨테이너) 확인 : 도커 컨테이너 이름은 myk8s-control-plane , myk8s-worker/worker-2 임을 확인 docker ps docker images # 디버그용 내용 출력에 ~/.kube/config 권한 인증 로드 kubectl get pod -v6 # kube config 파일 확인 : "server: https://172.19.21.65:35413" 부분에 접속 주소 잘 확인해두자! cat ~/.kube/config ls -l ~/.kube/config 퍼블릭은 아닌가보다. 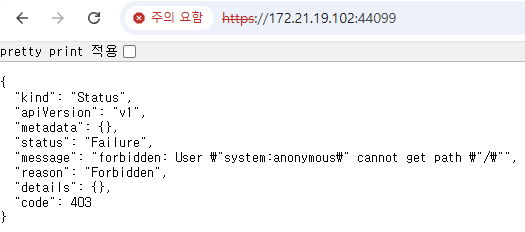 |
컨테이터 2대(Jenkins, gogs) : 호스트 OS 포트 노출(expose)로 접속 및 사용 : Windows (WSL2) 사용자
| # 작업 디렉토리 생성 후 이동 mkdir cicd-labs cd cicd-labs # kind 설치를 먼저 진행하여 docker network(kind) 생성 후 아래 Jenkins,gogs 생성 할 것 # docker network 확인 : kind 를 사용 docker network ls ... 9a64a01b380a kind bridge local ... # cat <<EOT > docker-compose.yaml services: jenkins: container_name: jenkins image: jenkins/jenkins restart: unless-stopped networks: - kind ports: - "8080:8080" - "50000:50000" volumes: - /var/run/docker.sock:/var/run/docker.sock - jenkins_home:/var/jenkins_home gogs: container_name: gogs image: gogs/gogs restart: unless-stopped networks: - kind ports: - "10022:22" - "3000:3000" volumes: - gogs-data:/data volumes: jenkins_home: gogs-data: networks: kind: external: true EOT # 배포 docker compose up -d docker compose ps docker inspect kind # 기본 정보 확인 for i in gogs jenkins ; do echo ">> container : $i <<"; docker compose exec $i sh -c "whoami && pwd"; echo; done # 도커를 이용하여 각 컨테이너로 접속 docker compose exec jenkins bash exit 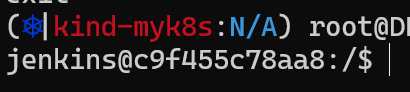 |
Jenkins 초기설정
| # Jenkins 초기 암호 확인 docker compose exec jenkins cat /var/jenkins_home/secrets/initialAdminPassword 9188eb149bc0402f88fd3dc19b2f2b03 # Jenkins 웹 접속 주소 확인 : 계정 / 암호 입력 >> admin / qwe123 웹 브라우저에서 http://127.0.0.1:8080 접속 # Windows # (참고) 로그 확인 : 플러그인 설치 과정 확인 docker compose logs jenkins -f  |
Jenkins 컨테이너에서 호스트에 도커 데몬 사용 설정 (Docker-out-of-Docker) : Windows (WSL2) 사용자
| # Jenkins 컨테이너 내부에 도커 실행 파일 설치 docker compose exec --privileged -u root jenkins bash ----------------------------------------------------- id curl -fsSL https://download.docker.com/linux/debian/gpg -o /etc/apt/keyrings/docker.asc chmod a+r /etc/apt/keyrings/docker.asc echo \ "deb [arch=$(dpkg --print-architecture) signed-by=/etc/apt/keyrings/docker.asc] https://download.docker.com/linux/debian \ $(. /etc/os-release && echo "$VERSION_CODENAME") stable" | \ tee /etc/apt/sources.list.d/docker.list > /dev/null apt-get update && apt install docker-ce-cli curl tree jq yq -y docker info docker ps which docker # Jenkins 컨테이너 내부에서 root가 아닌 jenkins 유저도 docker를 실행할 수 있도록 권한을 부여 groupadd -g 1001 -f docker # Windows WSL2(Container) >> cat /etc/group 에서 docker 그룹ID를 지정 chgrp docker /var/run/docker.sock ls -l /var/run/docker.sock usermod -aG docker jenkins cat /etc/group | grep docker exit -------------------------------------------- # Jenkins 컨테이너 재기동으로 위 설정 내용을 Jenkins app 에도 적용 필요 docker compose restart jenkins # jenkins user로 docker 명령 실행 확인 docker compose exec jenkins id docker compose exec jenkins docker info docker compose exec jenkins docker ps |
Gogs 컨테이너 초기 설정 : Repo(Private) - dev-app , ops-deploy : Windows (WSL2) 사용자
| 웹 브라우저에서 http://127.0.0.1:3000/install 접속 # Windows -설정 |
Gogs 실습을 위한 저장소 설정 : 호스트에서 직접 git 작업 , Windows 경우 WSL2 혹은 호스트에서 작업 둘 다 가능
| # (옵션) GIT 인증 정보 초기화 git credential-cache exit # git config --list --show-origin # TOKEN=f1f3d79be5e799fcd8bcc9c91ed46fa34b72d9da MyIP=172.21.19.102 git clone <각자 Gogs dev-app repo 주소> git clone http://devops:$TOKEN@$MyIP:3000/devops/dev-app.git Cloning into 'dev-app'... 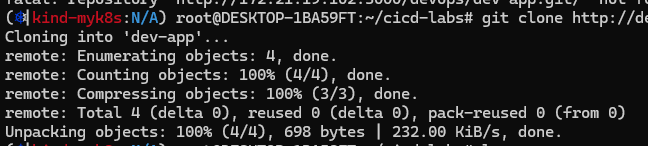 # cd dev-app # git --no-pager config --local --list git config --local user.name "devops" git config --local user.email "a@a.com" git config --local init.defaultBranch main git config --local credential.helper store git --no-pager config --local --list cat .git/config # git --no-pager branch git remote -v # server.py 파일 작성 cat > server.py <<EOF from http.server import ThreadingHTTPServer, BaseHTTPRequestHandler from datetime import datetime import socket class RequestHandler(BaseHTTPRequestHandler): def do_GET(self): match self.path: case '/': now = datetime.now() hostname = socket.gethostname() response_string = now.strftime("The time is %-I:%M:%S %p, VERSION 0.0.1\n") response_string += f"Server hostname: {hostname}\n" self.respond_with(200, response_string) case '/healthz': self.respond_with(200, "Healthy") case _: self.respond_with(404, "Not Found") def respond_with(self, status_code: int, content: str) -> None: self.send_response(status_code) self.send_header('Content-type', 'text/plain') self.end_headers() self.wfile.write(bytes(content, "utf-8")) def startServer(): try: server = ThreadingHTTPServer(('', 80), RequestHandler) print("Listening on " + ":".join(map(str, server.server_address))) server.serve_forever() except KeyboardInterrupt: server.shutdown() if __name__== "__main__": startServer() EOF # (참고) python 실행 확인 python3 server.py curl localhost curl localhost/healthz CTRL+C 실행 종료 # Dockerfile 생성 cat > Dockerfile <<EOF FROM python:3.12 ENV PYTHONUNBUFFERED 1 COPY . /app WORKDIR /app CMD python3 server.py EOF # VERSION 파일 생성 echo "0.0.1" > VERSION # tree git status git add . git commit -m "Add dev-app" git push -u origin main ... 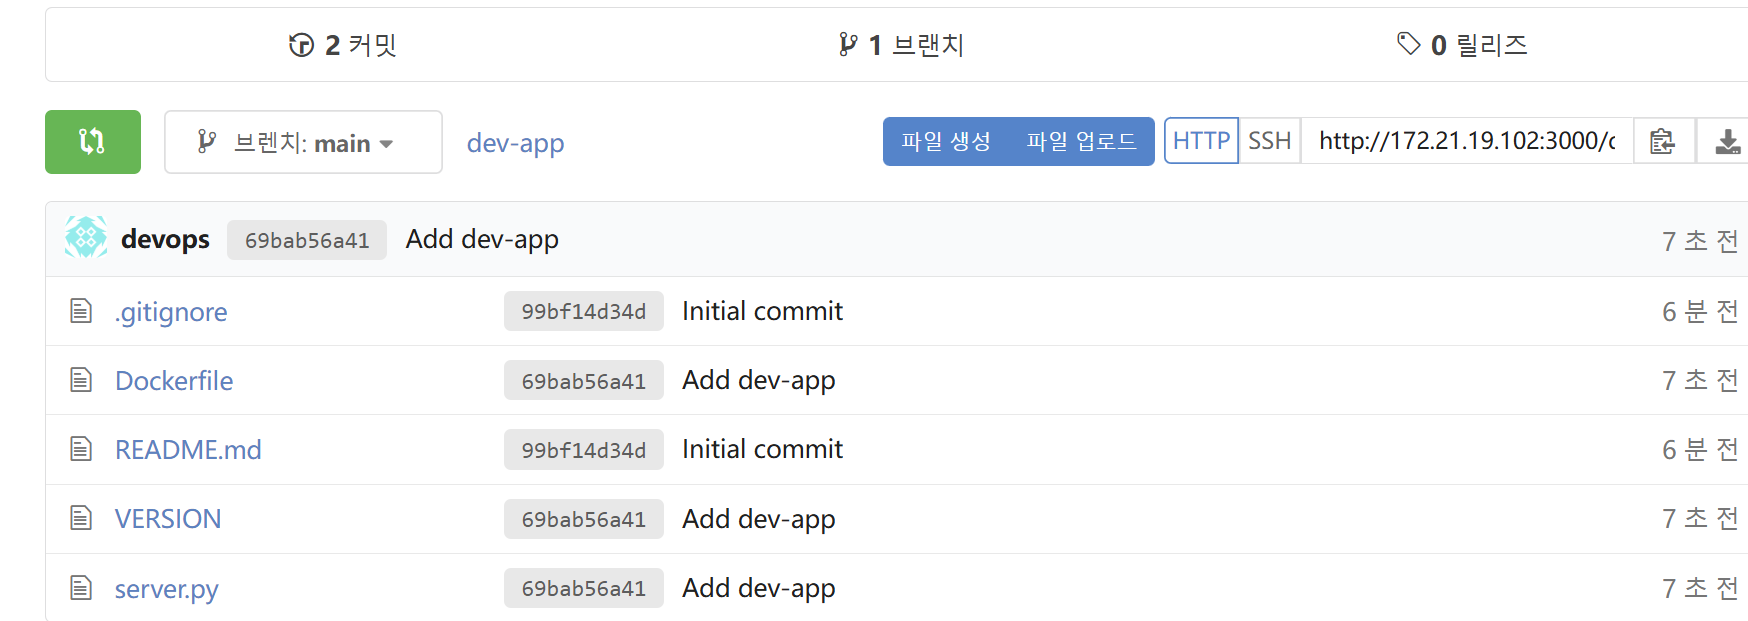 |
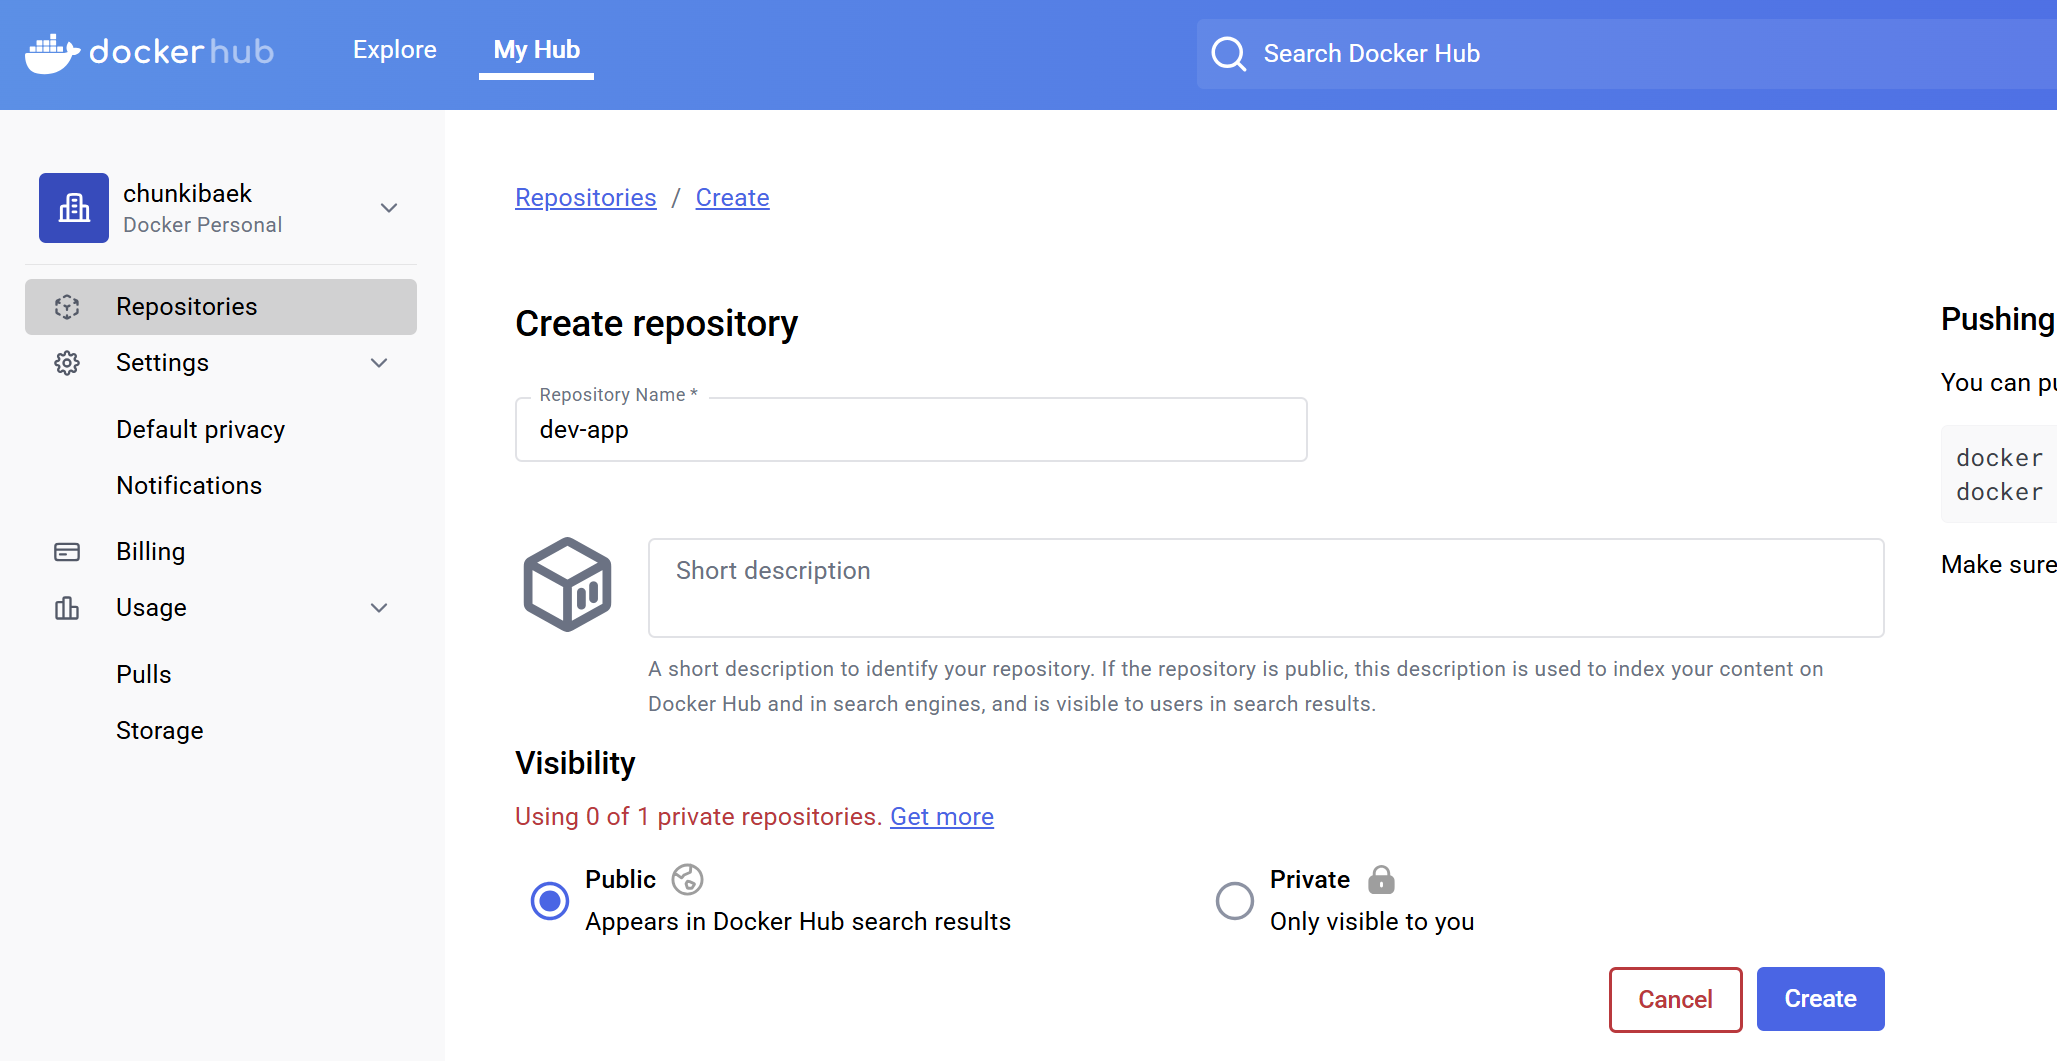
도커허브 token 생성
 |
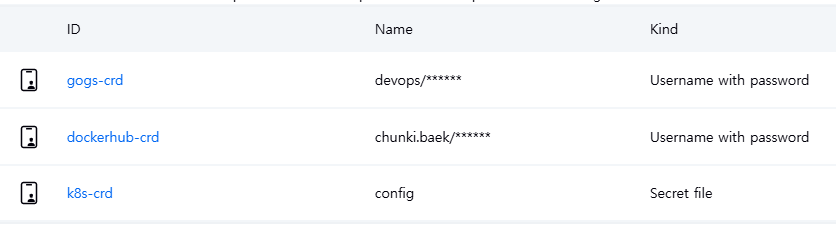
Jenkins 자격증명 등록
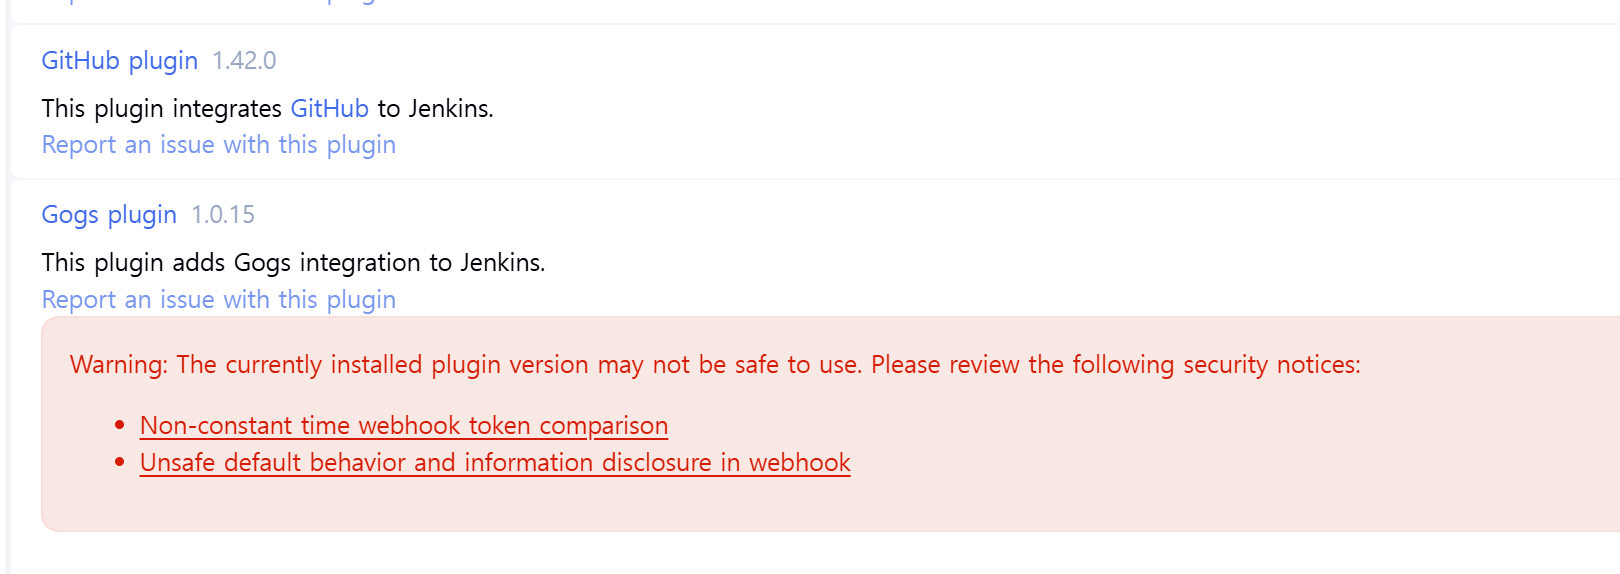
- Pipeline Stage View, Docker Pipeline, Gogs(Webhook Plugin) 설치
- 자격증명등록
 |
파이프라인 등록
| pipeline { agent any environment { DOCKER_IMAGE = 'chunkibaek/dev-app' // Docker 이미지 이름 } stages { stage('Checkout') { steps { git branch: 'main', url: 'http://172.21.19.102:3000/devops/dev-app.git', credentialsId: 'gogs-crd' } } stage('Read VERSION') { steps { script { // VERSION 파일 읽기 def version = readFile('VERSION').trim() echo "Version found: ${version}" // 환경 변수 설정 env.DOCKER_TAG = version } } } stage('Docker Build and Push') { steps { script { docker.withRegistry('https://index.docker.io/v1/', 'dockerhub-crd') { // DOCKER_TAG 사용 def appImage = docker.build("${DOCKER_IMAGE}:${DOCKER_TAG}") appImage.push() appImage.push("latest") } } } } } post { success { echo "Docker image ${DOCKER_IMAGE}:${DOCKER_TAG} has been built and pushed successfully!" } failure { echo "Pipeline failed. Please check the logs." } } } |
확인
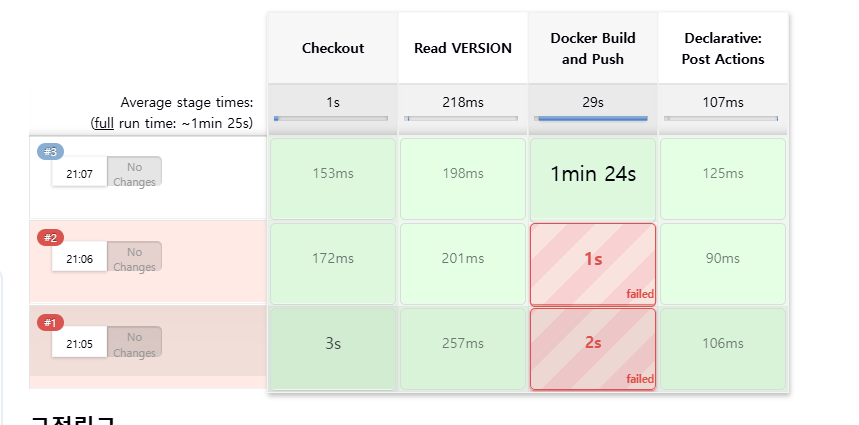
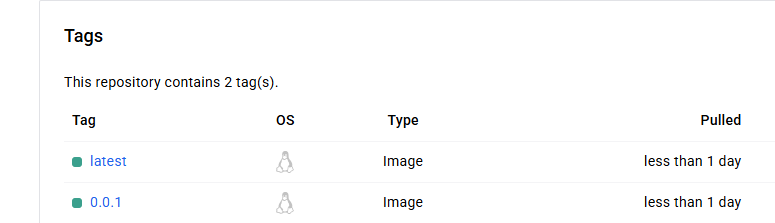
kube-ops-view 설치
| helm install kube-ops-view geek-cookbook/kube-ops-view --version 1.2.2 --set service.main.type=NodePort,service.main.ports.http.nodePort=30001 --set env.TZ="Asia/Seoul" --namespace kube-system |
업로드한 도커 image 실행
- docker 로그인, docker pull docker.io/chunkibaek/dev-app:0.0.1
| # 디플로이먼트 오브젝트 배포 : 리플리카(파드 2개), 컨테이너 이미지 >> 아래 도커 계정 부분만 변경해서 배포해보자 DHUSER=chunkibaek cat <<EOF | kubectl apply -f - apiVersion: apps/v1 kind: Deployment metadata: name: timeserver spec: replicas: 2 selector: matchLabels: pod: timeserver-pod template: metadata: labels: pod: timeserver-pod spec: containers: - name: timeserver-container image: docker.io/$DHUSER/dev-app:0.0.1 livenessProbe: initialDelaySeconds: 30 periodSeconds: 30 httpGet: path: /healthz port: 80 scheme: HTTP timeoutSeconds: 5 failureThreshold: 3 successThreshold: 1 EOF watch -d kubectl get deploy,rs,pod -o wide # 배포 상태 확인 : kube-ops-view 웹 확인 kubectl get events -w --sort-by '.lastTimestamp' kubectl get deploy,pod -o wide kubectl describe pod Fail 발생 |
등록
| # k8s secret : 도커 자격증명 설정 kubectl get secret -A # 생성 시 타입 지정 DHUSER=chunkibaek DHPASS= echo $DHUSER $DHPASS kubectl create secret docker-registry dockerhub-secret \ --docker-server=https://index.docker.io/v1/ \ --docker-username=$DHUSER \ --docker-password=$DHPASS # 확인 kubectl get secret kubectl describe secret kubectl get secrets -o yaml | kubectl neat # base64 인코딩 확인 SECRET=eyJhdXRocyI6eyJodHRwczovL2luZGV4LmRvY2tlci5pby92MS8iOnsidXNlcm5hbWUiOiJnYXNpZGEiLCJwYXNzd29yZCI6ImRja3JfcGF0X0tXeC0wTjI3aUVkMWxrOGFOdlJ6OHBEclFsSSIsImF1dGgiOiJaMkZ6YVdSaE9tUmphM0pmY0dGMFgwdFhlQzB3VGpJM2FVVmtNV3hyT0dGT2RsSjZPSEJFY2xGc1NRPT0ifX19 echo "$SECRET" | base64 -d ; echo # 디플로이먼트 오브젝트 업데이트 : 시크릿 적용 cat <<EOF | kubectl apply -f - apiVersion: apps/v1 kind: Deployment metadata: name: timeserver spec: replicas: 2 selector: matchLabels: pod: timeserver-pod template: metadata: labels: pod: timeserver-pod spec: containers: - name: timeserver-container image: docker.io/$DHUSER/dev-app:0.0.1 livenessProbe: initialDelaySeconds: 30 periodSeconds: 30 httpGet: path: /healthz port: 80 scheme: HTTP timeoutSeconds: 5 failureThreshold: 3 successThreshold: 1 imagePullSecrets: - name: dockerhub-secret EOF watch -d kubectl get deploy,rs,pod -o wide # 확인 kubectl get events -w --sort-by '.lastTimestamp' kubectl get deploy,pod 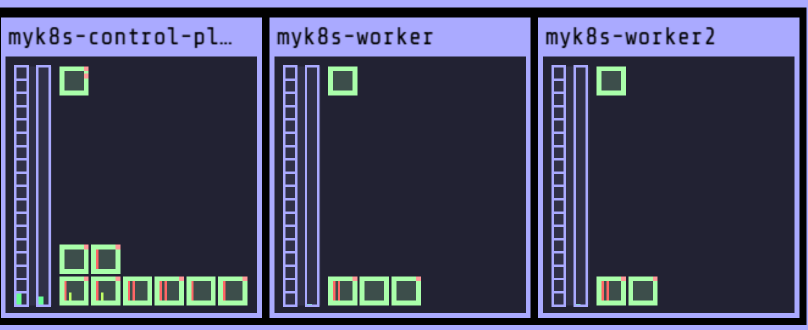 |
Gogs Webhooks 설정 : Jenkins Job Trigger
docker compose exec gogs bash 접속
gogs 에 /data/gogs/conf/app.ini 파일 수정 후 컨테이너 재기동
| [security] INSTALL_LOCK = true SECRET_KEY = j2xaUPQcbAEwpIu LOCAL_NETWORK_ALLOWLIST = 192.168.254.127 #값만 추가 |
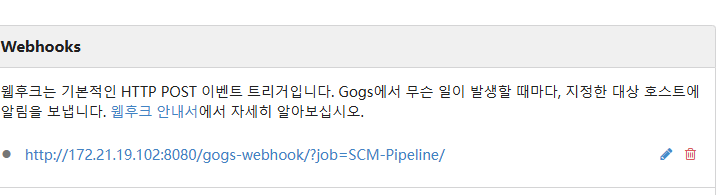
http://172.21.19.102:3000/devops/dev-app
SCM-Pipeline 생성
- GitHub project : http://***<mac IP>***:3000/***<Gogs 계정명>***/dev-app ← .git 은 제거
- *GitHub project : http://192.168.254.127:3000/devops/dev-app*
- Windows (WSL2) 사용자는 자신의 WSL2 Ubuntu eth0 IP
- *GitHub project : http://192.168.254.127:3000/devops/dev-app*
- Use Gogs secret : qwe123
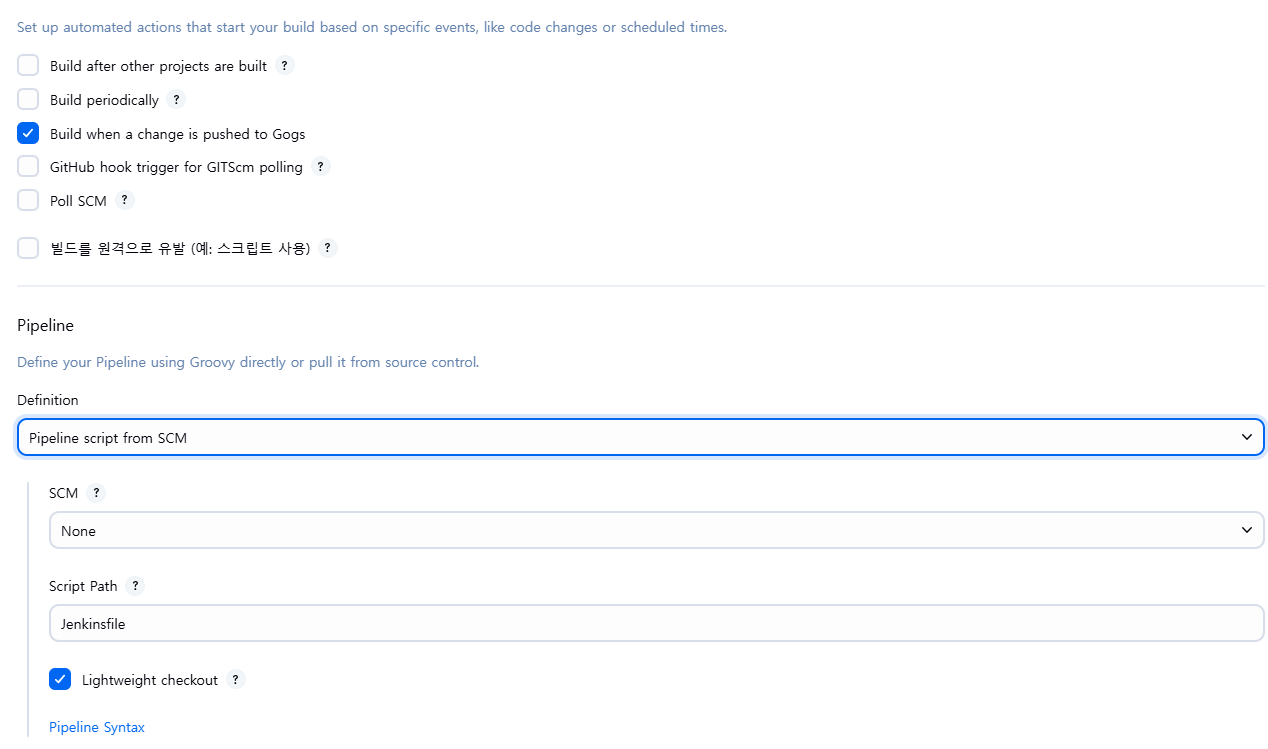
- Build Triggers : Build when a change is pushed to Gogs 체크
- Pipeline script from SCM
- SCM : Git
- Repo URL(http://***<mac IP>***:3000/***<Gogs 계정명>***/dev-app)
- Credentials(devops/***)
- Branch(*/main)
- Script Path : Jenkinsfile
- SCM : Git
Jenkins File 작성 후
| pipeline { agent any environment { DOCKER_IMAGE = 'gasida/dev-app' // Docker 이미지 이름 } stages { stage('Checkout') { steps { git branch: 'main', url: 'http://192.168.254.127:3000/devops/dev-app.git', // Git에서 코드 체크아웃 credentialsId: 'gogs-crd' // Credentials ID } } stage('Read VERSION') { steps { script { // VERSION 파일 읽기 def version = readFile('VERSION').trim() echo "Version found: ${version}" // 환경 변수 설정 env.DOCKER_TAG = version } } } stage('Docker Build and Push') { steps { script { docker.withRegistry('https://index.docker.io/v1/', 'dockerhub-crd') { // DOCKER_TAG 사용 def appImage = docker.build("${DOCKER_IMAGE}:${DOCKER_TAG}") appImage.push() appImage.push("latest") } } } } } post { success { echo "Docker image ${DOCKER_IMAGE}:${DOCKER_TAG} has been built and pushed successfully!" } failure { echo "Pipeline failed. Please check the logs." } } } |
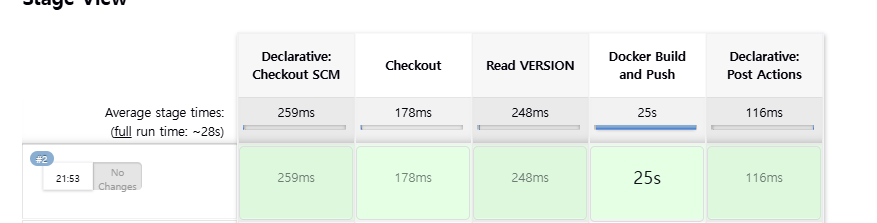
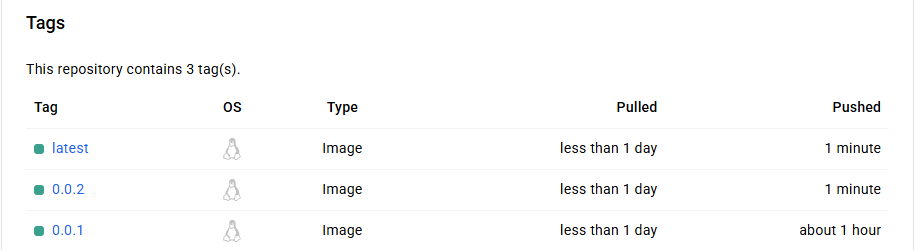
git add . && git commit -m "VERSION $(cat VERSION) Changed" && git push -u origin main
진행
2. Jenkins CI/CD + K8S(Kind)
컨테이너 내부에 설치
| # Install kubectl, helm docker compose exec --privileged -u root jenkins bash -------------------------------------------- #curl -LO "https://dl.k8s.io/release/v1.32.2/bin/linux/amd64/kubectl" curl -LO "https://dl.k8s.io/release/$(curl -L -s https://dl.k8s.io/release/stable.txt)/bin/linux/amd64/kubectl" # WindowOS install -o root -g root -m 0755 kubectl /usr/local/bin/kubectl kubectl version --client=true # curl https://raw.githubusercontent.com/helm/helm/main/scripts/get-helm-3 | bash helm version exit -------------------------------------------- docker compose exec jenkins kubectl version --client=true docker compose exec jenkins helm version  |
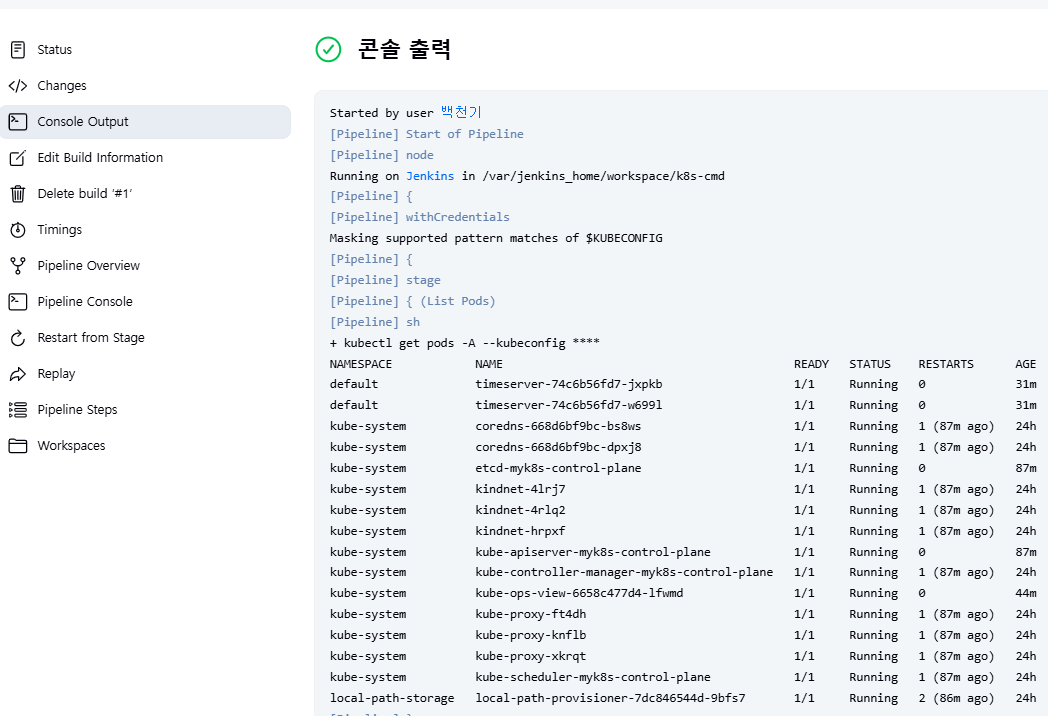
Jenkins Item 생성(Pipeline) : item name(k8s-cmd)
| pipeline { agent any environment { KUBECONFIG = credentials('k8s-crd') } stages { stage('List Pods') { steps { sh ''' # Fetch and display Pods kubectl get pods -A --kubeconfig "$KUBECONFIG" ''' } } } } |
| # cd dev-app # mkdir deploy # cat > deploy/echo-server-blue.yaml <<EOF apiVersion: apps/v1 kind: Deployment metadata: name: echo-server-blue spec: replicas: 2 selector: matchLabels: app: echo-server version: blue template: metadata: labels: app: echo-server version: blue spec: containers: - name: echo-server image: hashicorp/http-echo args: - "-text=Hello from Blue" ports: - containerPort: 5678 EOF cat > deploy/echo-server-service.yaml <<EOF apiVersion: v1 kind: Service metadata: name: echo-server-service spec: selector: app: echo-server version: blue ports: - protocol: TCP port: 80 targetPort: 5678 nodePort: 30000 type: NodePort EOF cat > deploy/echo-server-green.yaml <<EOF apiVersion: apps/v1 kind: Deployment metadata: name: echo-server-green spec: replicas: 2 selector: matchLabels: app: echo-server version: green template: metadata: labels: app: echo-server version: green spec: containers: - name: echo-server image: hashicorp/http-echo args: - "-text=Hello from Green" ports: - containerPort: 5678 EOF # tree git add . && git commit -m "Add echo server yaml" && git push -u origin main |
Jenkins 파이프라인 생성
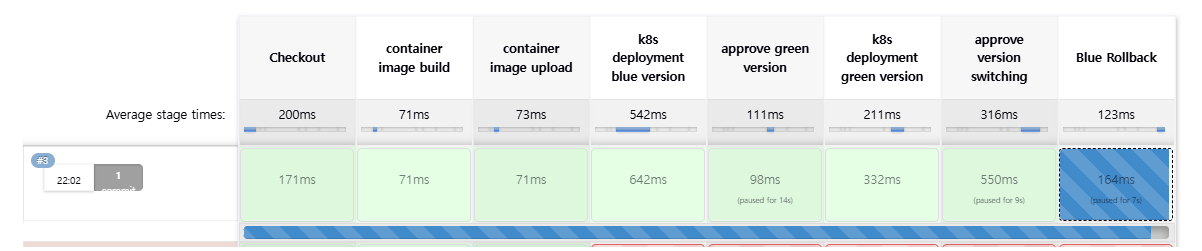
| pipeline { agent any environment { KUBECONFIG = credentials('k8s-crd') } stages { stage('Checkout') { steps { git branch: 'main', url: 'http://172.21.19.102.127:3000/devops/dev-app.git', // Git에서 코드 체크아웃 credentialsId: 'gogs-crd' // Credentials ID } } stage('container image build') { steps { echo "container image build" } } stage('container image upload') { steps { echo "container image upload" } } stage('k8s deployment blue version') { steps { sh "kubectl apply -f ./deploy/echo-server-blue.yaml --kubeconfig $KUBECONFIG" sh "kubectl apply -f ./deploy/echo-server-service.yaml --kubeconfig $KUBECONFIG" } } stage('approve green version') { steps { input message: 'approve green version', ok: "Yes" } } stage('k8s deployment green version') { steps { sh "kubectl apply -f ./deploy/echo-server-green.yaml --kubeconfig $KUBECONFIG" } } stage('approve version switching') { steps { script { returnValue = input message: 'Green switching?', ok: "Yes", parameters: [booleanParam(defaultValue: true, name: 'IS_SWITCHED')] if (returnValue) { sh "kubectl patch svc echo-server-service -p '{\"spec\": {\"selector\": {\"version\": \"green\"}}}' --kubeconfig $KUBECONFIG" } } } } stage('Blue Rollback') { steps { script { returnValue = input message: 'Blue Rollback?', parameters: [choice(choices: ['done', 'rollback'], name: 'IS_ROLLBACk')] if (returnValue == "done") { sh "kubectl delete -f ./deploy/echo-server-blue.yaml --kubeconfig $KUBECONFIG" } if (returnValue == "rollback") { sh "kubectl patch svc echo-server-service -p '{\"spec\": {\"selector\": {\"version\": \"blue\"}}}' --kubeconfig $KUBECONFIG" } } } } } } |
① Checkout
- Git 저장소(http://172.21.19.102.127:3000/devops/dev-app.git)에서 소스 코드를 받아옵니다.
② Container image build
- 애플리케이션의 컨테이너 이미지를 빌드합니다. (실제 빌드 명령은 아직 작성되지 않고 에코로만 되어있음)
③ Container image upload
- 빌드된 컨테이너 이미지를 컨테이너 레지스트리에 업로드합니다. (여기도 실제 명령이 아직 작성되지 않음)
④ K8s deployment blue version
- Kubernetes에 현재 서비스 중인 버전인 blue 버전을 배포합니다.
- 배포할 때 사용하는 YAML:
- echo-server-blue.yaml: blue 버전 deployment
- echo-server-service.yaml: 서비스 정의(기본적으로 blue에 연결)
⑤ Approve green version
- 관리자의 승인을 받고 green 버전 배포를 진행합니다.
⑥ K8s deployment green version
- 새롭게 배포할 버전인 green 버전을 Kubernetes에 배포합니다.
- 사용하는 YAML:
- echo-server-green.yaml
이 시점에서는 아직 트래픽이 blue 버전으로 가고 있습니다.
⑦ Approve version switching
- 관리자의 승인 후, 서비스의 selector를 green 버전으로 전환하여 실제 서비스 트래픽을 green 버전으로 전환합니다.
- 승인되지 않으면 blue 버전이 계속 서비스됩니다.
⑧ Blue Rollback
- green 버전을 서비스한 이후 문제가 없다면 done 선택 시 blue 버전을 삭제합니다.
- 만약 문제가 발생하면 rollback 선택 시 트래픽을 다시 blue로 되돌립니다.
3. Argo CD + K8S(Kind)
Argo CD 설치
| # 네임스페이스 생성 및 파라미터 파일 작성 cd cicd-labs kubectl create ns argocd cat <<EOF > argocd-values.yaml dex: enabled: false server: service: type: NodePort nodePortHttps: 30002 extraArgs: - --insecure # HTTPS 대신 HTTP 사용 EOF # 설치 helm repo add argo https://argoproj.github.io/argo-helm helm install argocd argo/argo-cd --version 7.8.13 -f argocd-values.yaml --namespace argocd # 7.7.10 helm upgrade argocd argo/argo-cd --reuse-values -f argocd-values.yaml --namespace argocd # 확인 kubectl get pod,svc,ep,secret,cm -n argocd kubectl get crd | grep argo applications.argoproj.io 2024-04-14T08:12:16Z applicationsets.argoproj.io 2024-04-14T08:12:17Z appprojects.argoproj.io 2024-04-14T08:12:16Z kubectl get appproject -n argocd -o yaml # configmap kubectl get cm -n argocd argocd-cm -o yaml kubectl get cm -n argocd argocd-rbac-cm -o yaml ... data: policy.csv: "" policy.default: "" policy.matchMode: glob scopes: '[groups]' # 최초 접속 암호 확인 kubectl -n argocd get secret argocd-initial-admin-secret -o jsonpath="{.data.password}" | base64 -d ;echo DE9tW3X0k1eJjAsv # Argo CD 웹 접속 주소 확인 : 초기 암호 입력 (admin 계정) ## Windows OS경우 직접 웹 브라우저에서 http://127.0.0.1:30002 접속 |

helm 차트 배포
| # cd cicd-labs mkdir nginx-chart cd nginx-chart mkdir templates cat > templates/configmap.yaml <<EOF apiVersion: v1 kind: ConfigMap metadata: name: {{ .Release.Name }} data: index.html: | {{ .Values.indexHtml | indent 4 }} EOF cat > templates/deployment.yaml <<EOF apiVersion: apps/v1 kind: Deployment metadata: name: {{ .Release.Name }} spec: replicas: {{ .Values.replicaCount }} selector: matchLabels: app: {{ .Release.Name }} template: metadata: labels: app: {{ .Release.Name }} spec: containers: - name: nginx image: {{ .Values.image.repository }}:{{ .Values.image.tag }} ports: - containerPort: 80 volumeMounts: - name: index-html mountPath: /usr/share/nginx/html/index.html subPath: index.html volumes: - name: index-html configMap: name: {{ .Release.Name }} EOF cat > templates/service.yaml <<EOF apiVersion: v1 kind: Service metadata: name: {{ .Release.Name }} spec: selector: app: {{ .Release.Name }} ports: - protocol: TCP port: 80 targetPort: 80 nodePort: 30000 type: NodePort EOF cat > values.yaml <<EOF indexHtml: | <!DOCTYPE html> <html> <head> <title>Welcome to Nginx!</title> </head> <body> <h1>Hello, Kubernetes!</h1> <p>Nginx version 1.26.1</p> </body> </html> image: repository: nginx tag: 1.26.1 replicaCount: 1 EOF cat > Chart.yaml <<EOF apiVersion: v2 name: nginx-chart description: A Helm chart for deploying Nginx with custom index.html type: application version: 1.0.0 appVersion: "1.26.1" EOF # 이전 timeserver/service(nodeport) 삭제 kubectl delete deploy,svc --all # 직접 배포 해보기 helm template dev-nginx . -f values.yaml helm install dev-nginx . -f values.yaml helm list kubectl get deploy,svc,ep,cm dev-nginx -owide # curl http://127.0.0.1:30000 curl -s http://127.0.0.1:30000 | grep version open http://127.0.0.1:30000 # value 값 변경 후 적용 해보기 : version/tag, replicaCount cat > values.yaml <<EOF indexHtml: | <!DOCTYPE html> <html> <head> <title>Welcome to Nginx!</title> </head> <body> <h1>Hello, Kubernetes!</h1> <p>Nginx version 1.26.2</p> </body> </html> image: repository: nginx tag: 1.26.2 replicaCount: 2 EOF sed -i '' "s|1.26.1|1.26.2|g" Chart.yaml # helm chart 업그레이드 적용 helm template dev-nginx . -f values.yaml # 적용 전 렌더링 확인 Render chart templates locally and display the output. helm upgrade dev-nginx . -f values.yaml # 확인 helm list kubectl get deploy,svc,ep,cm dev-nginx -owide curl http://127.0.0.1:30000 curl -s http://127.0.0.1:30000 | grep version open http://127.0.0.1:30000  # 확인 후 삭제 helm uninstall dev-nginx |
배포 TEST
| # cd cicd-labs MYIP=172.21.19.102 TOKEN=f1f3d79be5e799fcd8bcc9c91ed46fa34b72d9da git clone http://devops:$TOKEN@$MyIP:3000/devops/ops-deploy.git cd ops-deploy # git --no-pager config --local --list git config --local user.name "devops" git config --local user.email "a@a.com" git config --local init.defaultBranch main git config --local credential.helper store git --no-pager config --local --list cat .git/config # git --no-pager branch git remote -v # VERSION=1.26.1 mkdir nginx-chart mkdir nginx-chart/templates cat > nginx-chart/VERSION <<EOF $VERSION EOF cat > nginx-chart/templates/configmap.yaml <<EOF apiVersion: v1 kind: ConfigMap metadata: name: {{ .Release.Name }} data: index.html: | {{ .Values.indexHtml | indent 4 }} EOF cat > nginx-chart/templates/deployment.yaml <<EOF apiVersion: apps/v1 kind: Deployment metadata: name: {{ .Release.Name }} spec: replicas: {{ .Values.replicaCount }} selector: matchLabels: app: {{ .Release.Name }} template: metadata: labels: app: {{ .Release.Name }} spec: containers: - name: nginx image: {{ .Values.image.repository }}:{{ .Values.image.tag }} ports: - containerPort: 80 volumeMounts: - name: index-html mountPath: /usr/share/nginx/html/index.html subPath: index.html volumes: - name: index-html configMap: name: {{ .Release.Name }} EOF cat > nginx-chart/templates/service.yaml <<EOF apiVersion: v1 kind: Service metadata: name: {{ .Release.Name }} spec: selector: app: {{ .Release.Name }} ports: - protocol: TCP port: 80 targetPort: 80 nodePort: 30000 type: NodePort EOF cat > nginx-chart/values-dev.yaml <<EOF indexHtml: | <!DOCTYPE html> <html> <head> <title>Welcome to Nginx!</title> </head> <body> <h1>Hello, Kubernetes!</h1> <p>DEV : Nginx version $VERSION</p> </body> </html> image: repository: nginx tag: $VERSION replicaCount: 1 EOF cat > nginx-chart/values-prd.yaml <<EOF indexHtml: | <!DOCTYPE html> <html> <head> <title>Welcome to Nginx!</title> </head> <body> <h1>Hello, Kubernetes!</h1> <p>PRD : Nginx version $VERSION</p> </body> </html> image: repository: nginx tag: $VERSION replicaCount: 2 EOF cat > nginx-chart/Chart.yaml <<EOF apiVersion: v2 name: nginx-chart description: A Helm chart for deploying Nginx with custom index.html type: application version: 1.0.0 appVersion: "$VERSION" EOF tree nginx-chart nginx-chart ├── Chart.yaml ├── VERSION ├── templates │ ├── configmap.yaml │ ├── deployment.yaml │ └── service.yaml ├── values-dev.yaml └── values-prd.yaml # helm template dev-nginx nginx-chart -f nginx-chart/values-dev.yaml helm template prd-nginx nginx-chart -f nginx-chart/values-prd.yaml DEVNGINX=$(helm template dev-nginx nginx-chart -f nginx-chart/values-dev.yaml | sed 's/---//g') PRDNGINX=$(helm template prd-nginx nginx-chart -f nginx-chart/values-prd.yaml | sed 's/---//g') diff <(echo "$DEVNGINX") <(echo "$PRDNGINX") # git status && git add . && git commit -m "Add nginx helm chart" && git push -u origin main 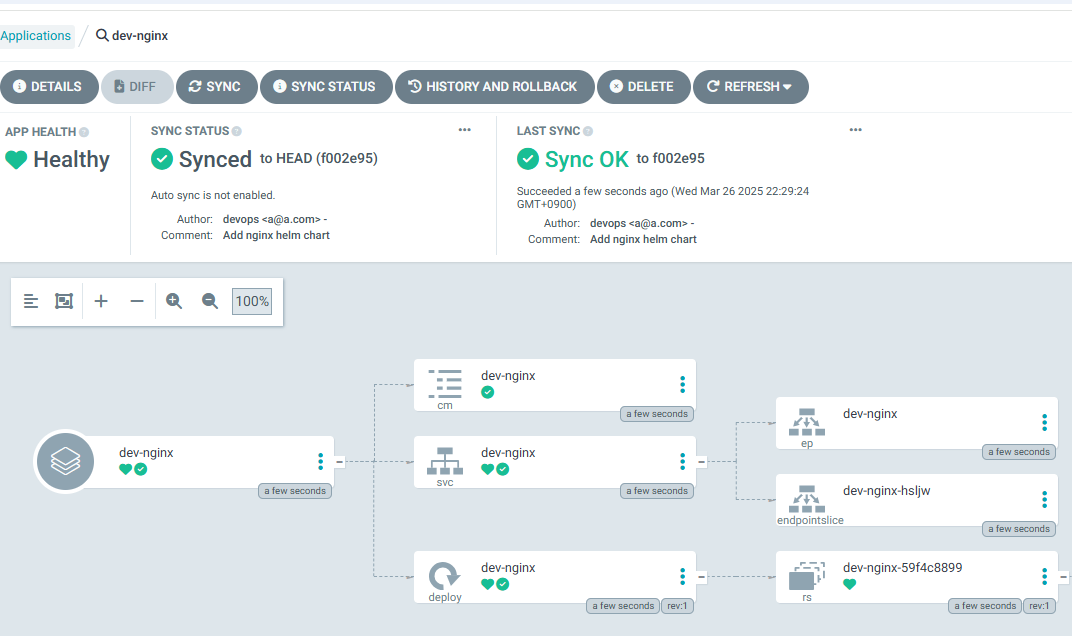 |
dev-nginx App 생성 및 Auto SYNC
| # echo $MyIP cat <<EOF | kubectl apply -f - apiVersion: argoproj.io/v1alpha1 kind: Application metadata: name: dev-nginx namespace: argocd finalizers: - resources-finalizer.argocd.argoproj.io spec: project: default source: helm: valueFiles: - values-dev.yaml path: nginx-chart repoURL: http://$MyIP:3000/devops/ops-deploy targetRevision: HEAD syncPolicy: automated: prune: true syncOptions: - CreateNamespace=true destination: namespace: dev-nginx server: https://kubernetes.default.svc EOF # kubectl get applications -n argocd dev-nginx kubectl get applications -n argocd dev-nginx -o yaml | kubectl neat kubectl describe applications -n argocd dev-nginx kubectl get pod,svc,ep,cm -n dev-nginx # curl http://127.0.0.1:30000 open http://127.0.0.1:30000 # Argo CD App 삭제 kubectl delete applications -n argocd dev-nginx |
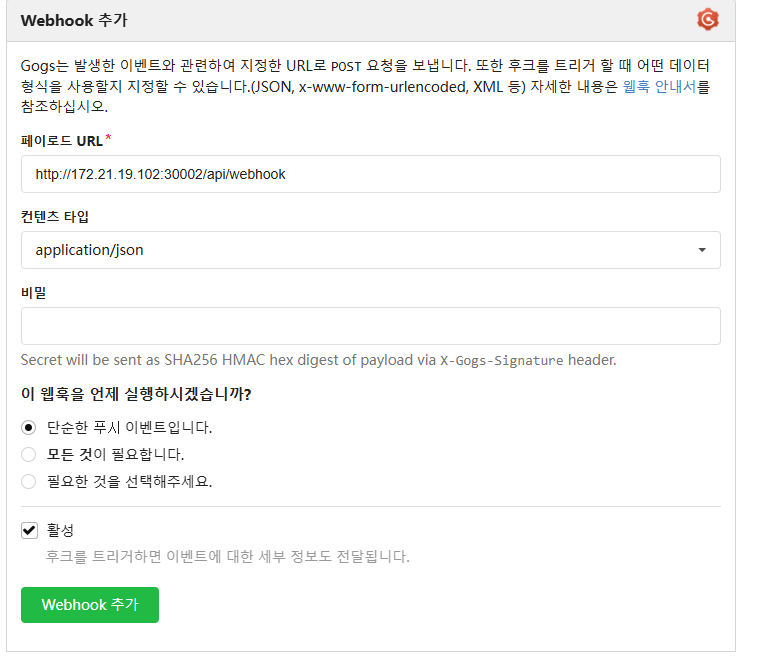
Repo(ops-deploy) 에 Webhook 를 통해 Argo CD 에 즉시 반영
- Repo(ops-deploy) 에 webhooks 설정 : Gogs 선택
| # echo $MyIP cat <<EOF | kubectl apply -f - apiVersion: argoproj.io/v1alpha1 kind: Application metadata: name: dev-nginx namespace: argocd finalizers: - resources-finalizer.argocd.argoproj.io spec: project: default source: helm: valueFiles: - values-dev.yaml path: nginx-chart repoURL: http://$MyIP:3000/devops/ops-deploy targetRevision: HEAD syncPolicy: automated: prune: true syncOptions: - CreateNamespace=true destination: namespace: dev-nginx server: https://kubernetes.default.svc EOF # kubectl get applications -n argocd dev-nginx kubectl get applications -n argocd dev-nginx -o yaml | kubectl neat kubectl describe applications -n argocd dev-nginx kubectl get pod,svc,ep,cm -n dev-nginx # curl http://127.0.0.1:30000 open http://127.0.0.1:30000 |
소스변경
| # cd cicd-labs/ops-deploy/nginx-chart # sed -i '' "s|replicaCount: 2|replicaCount: 3|g" values-dev.yaml git add values-dev.yaml && git commit -m "Modify nginx-chart : values-dev.yaml" && git push -u origin main watch -d kubectl get all -n dev-nginx -o wide 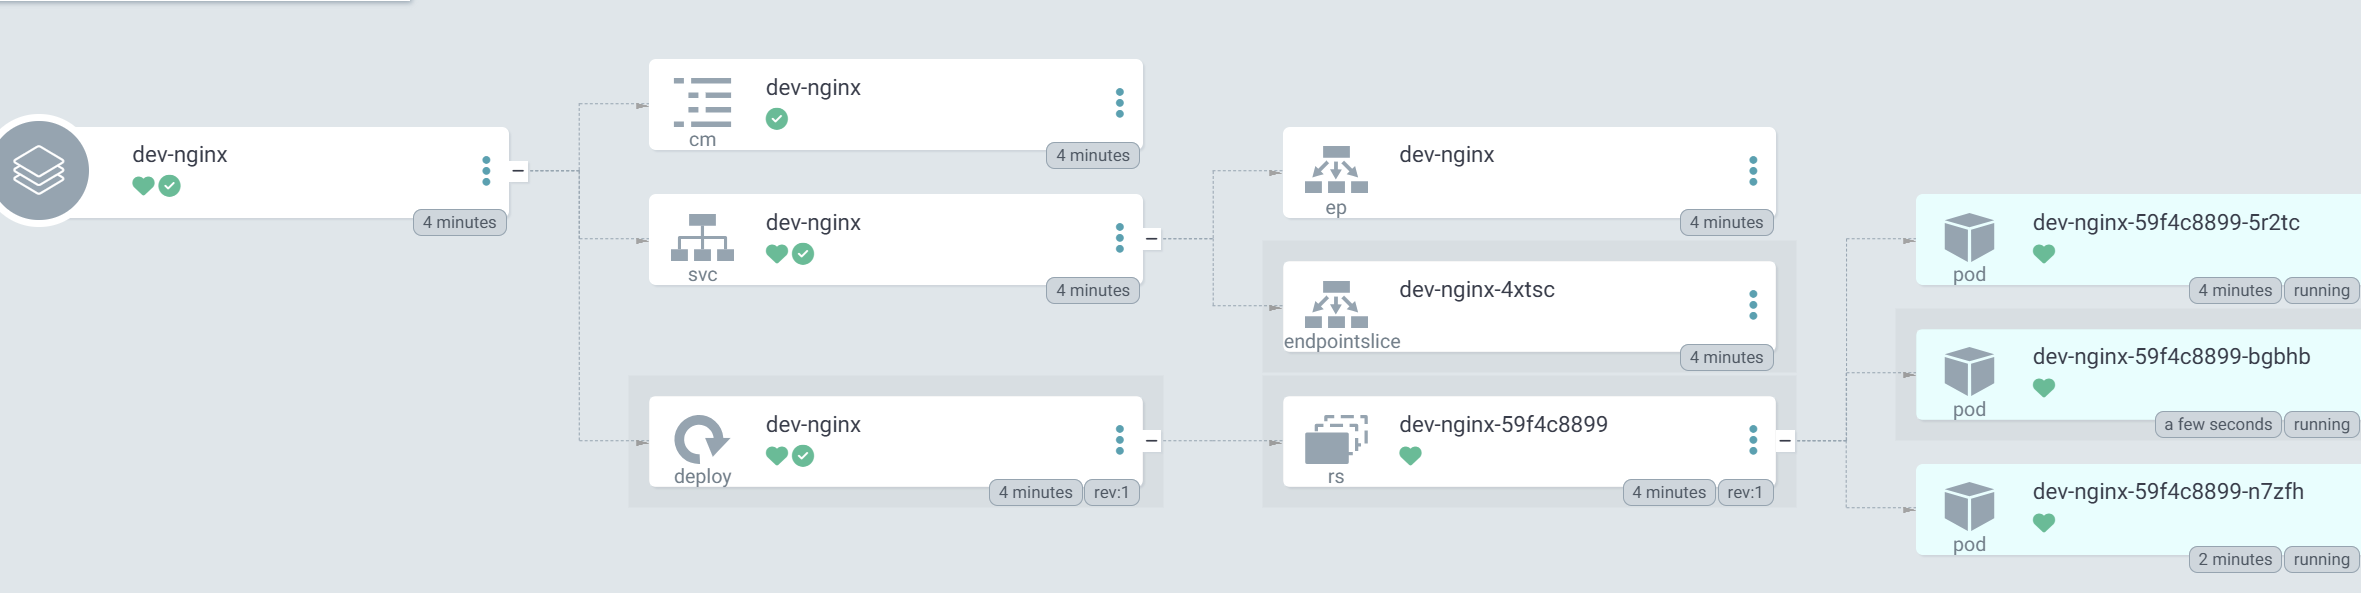 # sed -i '' "s|replicaCount: 3|replicaCount: 4|g" values-dev.yaml git add values-dev.yaml && git commit -m "Modify nginx-chart : values-dev.yaml" && git push -u origin main watch -d kubectl get all -n dev-nginx -o wide # sed -i '' "s|replicaCount: 4|replicaCount: 2|g" values-dev.yaml git add values-dev.yaml && git commit -m "Modify nginx-chart : values-dev.yaml" && git push -u origin main watch -d kubectl get all -n dev-nginx -o wide |
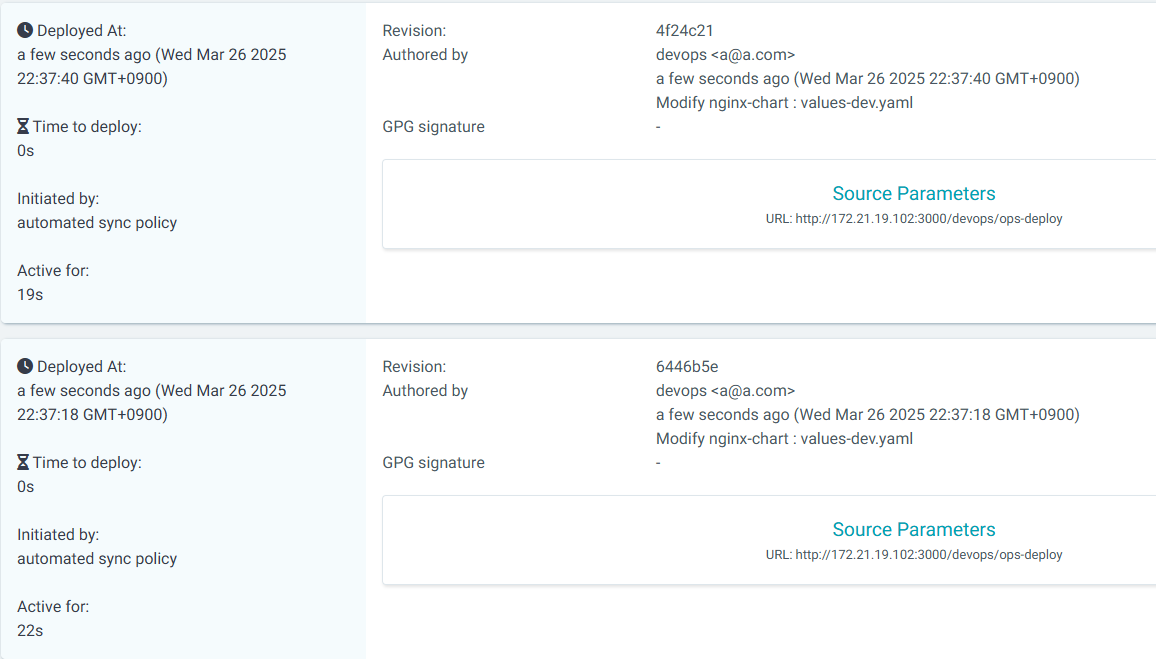
4. Jenkins CI + Argo CD + K8S(Kind)
기본작업
| # cd ops-deploy # mkdir dev-app # 도커 계정 정보 DHUSER=chunkibaek # 버전 정보 VERSION=0.0.1 # cat > dev-app/VERSION <<EOF $VERSION EOF cat > dev-app/timeserver.yaml <<EOF apiVersion: apps/v1 kind: Deployment metadata: name: timeserver spec: replicas: 2 selector: matchLabels: pod: timeserver-pod template: metadata: labels: pod: timeserver-pod spec: containers: - name: timeserver-container image: docker.io/$DHUSER/dev-app:$VERSION livenessProbe: initialDelaySeconds: 30 periodSeconds: 30 httpGet: path: /healthz port: 80 scheme: HTTP timeoutSeconds: 5 failureThreshold: 3 successThreshold: 1 imagePullSecrets: - name: dockerhub-secret EOF cat > dev-app/service.yaml <<EOF apiVersion: v1 kind: Service metadata: name: timeserver spec: selector: pod: timeserver-pod ports: - port: 80 targetPort: 80 protocol: TCP nodePort: 30000 type: NodePort EOF # git add . && git commit -m "Add dev-app deployment yaml" && git push -u origin main |
Repo(ops-deploy) 를 바라보는 ArgoCD App 생성
| # echo $MyIP cat <<EOF | kubectl apply -f - apiVersion: argoproj.io/v1alpha1 kind: Application metadata: name: timeserver namespace: argocd finalizers: - resources-finalizer.argocd.argoproj.io spec: project: default source: path: dev-app repoURL: http://$MyIP:3000/devops/ops-deploy targetRevision: HEAD syncPolicy: automated: prune: true syncOptions: - CreateNamespace=true destination: namespace: default server: https://kubernetes.default.svc EOF # kubectl get applications -n argocd timeserver kubectl get applications -n argocd timeserver -o yaml | kubectl neat kubectl describe applications -n argocd timeserver kubectl get deploy,rs,pod kubectl get svc,ep timeserver # curl http://127.0.0.1:30000 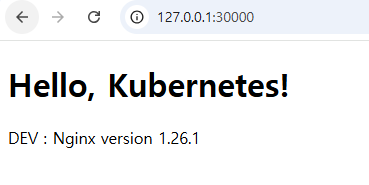 |
- Repo(dev-app) 코드 작업
- dev-app Repo에 VERSION 업데이트 시 → ops-deploy Repo 에 dev-app 에 파일에 버전 정보 업데이트 작업 추가
- 기존 버전 정보는 VERSION 파일 내에 정보를 가져와서 변수 지정 : OLDVER=$(cat dev-app/VERSION)
- 신규 버전 정보는 environment 도커 태그 정보를 가져와서 변수 지정 : NEWVER=$(echo ${DOCKER_TAG})
- 이후 sed 로 ops-deploy Repo 에 dev-app/VERSION, timeserver.yaml 2개 파일에 ‘기존 버전’ → ‘신규 버전’으로 값 변경
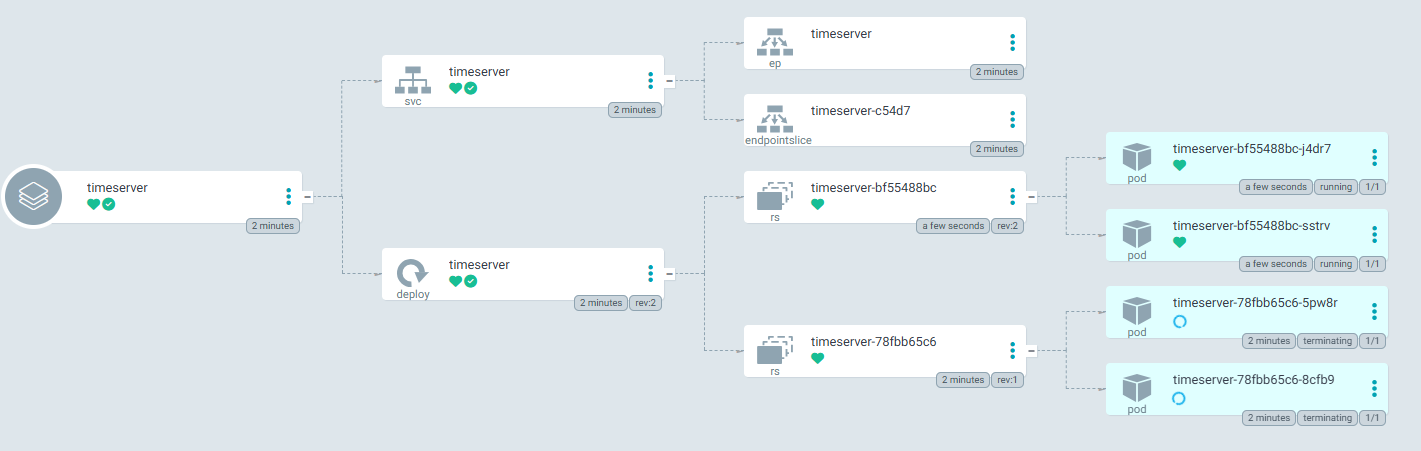
- 이후 ops-deploy Repo 에 git push ⇒ Argo CD App Trigger 후 AutoSync 로 신규 버전 업데이트 진행
- dev-app Repo에 VERSION 업데이트 시 → ops-deploy Repo 에 dev-app 에 파일에 버전 정보 업데이트 작업 추가
| pipeline { agent any environment { DOCKER_IMAGE = 'chunkibaek/dev-app' // Docker 이미지 이름 GOGSCRD = credentials('gogs-crd') } stages { stage('dev-app Checkout') { steps { git branch: 'main', url: 'http://172.21.19.102:3000/devops/dev-app.git', // Git에서 코드 체크아웃 credentialsId: 'gogs-crd' // Credentials ID } } stage('Read VERSION') { steps { script { // VERSION 파일 읽기 def version = readFile('VERSION').trim() echo "Version found: ${version}" // 환경 변수 설정 env.DOCKER_TAG = version } } } stage('Docker Build and Push') { steps { script { docker.withRegistry('https://index.docker.io/v1/', 'dockerhub-crd') { // DOCKER_TAG 사용 def appImage = docker.build("${DOCKER_IMAGE}:${DOCKER_TAG}") appImage.push() appImage.push("latest") } } } } stage('ops-deploy Checkout') { steps { git branch: 'main', url: 'http://172.21.19.102:3000/devops/ops-deploy.git', // Git에서 코드 체크아웃 credentialsId: 'gogs-crd' // Credentials ID } } stage('ops-deploy version update push') { steps { sh ''' OLDVER=$(cat dev-app/VERSION) NEWVER=$(echo ${DOCKER_TAG}) sed -i '' "s/$OLDVER/$NEWVER/" dev-app/timeserver.yaml sed -i '' "s/$OLDVER/$NEWVER/" dev-app/VERSION git add ./dev-app git config user.name "devops" git config user.email "a@a.com" git commit -m "version update ${DOCKER_TAG}" git push http://${GOGSCRD_USR}:${GOGSCRD_PSW}@172.21.19.102:3000/devops/ops-deploy.git ''' } } } post { success { echo "Docker image ${DOCKER_IMAGE}:${DOCKER_TAG} has been built and pushed successfully!" } failure { echo "Pipeline failed. Please check the logs." } } } |
파이프라인 정상작동 확인
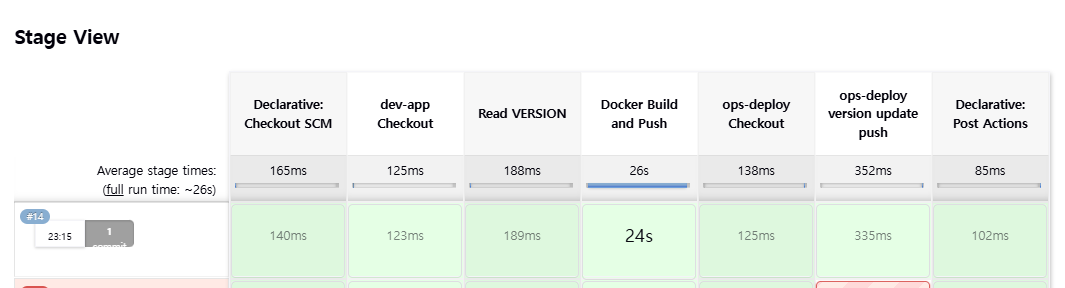
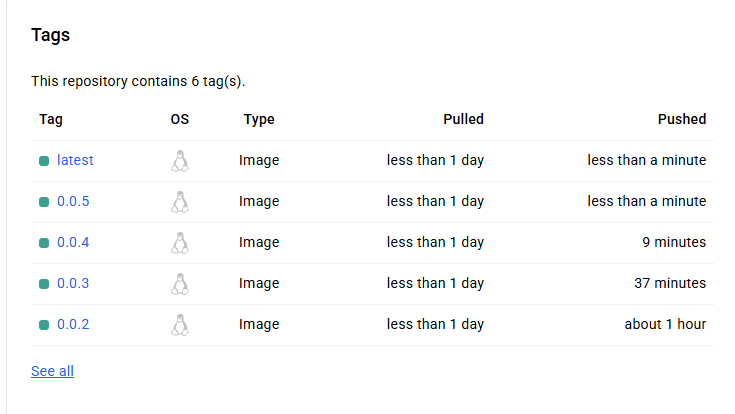
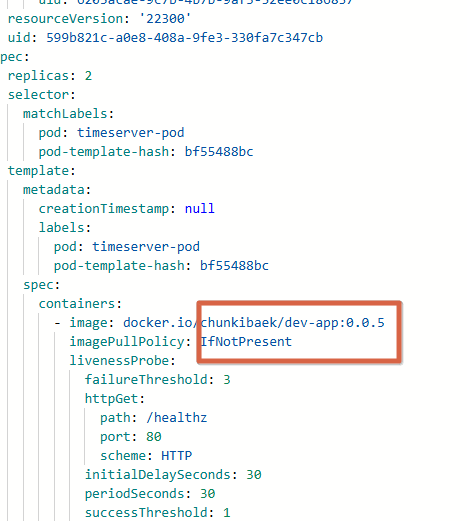
버전을 올린 후 push 하면 자동으로 배포된다.